LabelView 是一个标签选择控件。
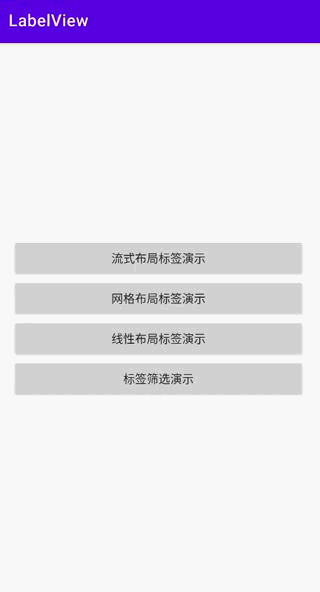
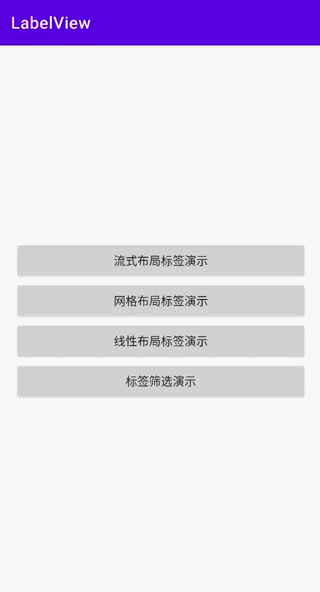
1. 预览
| 流式布局 | 网格布局 |
|---|---|
 |
 |
| 线性布局 | 标签筛选 |
 |
 |
2. 使用
- 在根目录下的
build.gradle文件中的 repositories 下添加:
allprojects {
    repositories {
        maven { url 'https://jitpack.io' }
    }
}
- 添加依赖
dependencies {
    implementation 'com.github.viifo:LabelView:1.0.0'
}
- 在 XML 中添加:
<com.viifo.labelview.LabelLayout
    android:layout_width="match_parent"
    android:layout_height="wrap_content" />
- 标签监听:
// 设置标签数据
val labels = listOf(...)
labelLayout.setLabelList(labels)
// 标签默认选中
// labelLayout.setLabelList(labels, defultSelectedLabels)

// 设置标签改变事件监听
labelLayout.setOnItemSelectedChangeListener<String> { selected, status ->
    // selected 为当前使用所有选中的标签
    if (status is LabelChangeStatus.ADD) {
        // todo 标签选中
        // status.item 为选中的标签列表
    } else if (status is LabelChangeStatus.REMOVE) {
        // todo 标签取消选中
        // status.item 为取消选中的标签列表
    } else if (status is LabelChangeStatus.INIT) {
        // todo 标签初始化(默认)选中事件
    }
}
- 自定义标签布局:
<com.viifo.labelview.LabelLayout
    android:layout_width="match_parent"
    android:layout_height="wrap_content"
    app:itemLayout="@layout/label_view_item_with_custom" />
labelLayout.setLabelList(
    data = labels, // 标签数据
    selectedData = null, // 默认选中的标签(可选)
    converter = { holder, item, selected ->
        // todo 自定义标签绑定 view
        // selected - 当前标签是否应该被选中
    }
)
3. 实现原理
LabelView 控件继承自 RecyclerView, 利用 LinearLayoutManager、GridLayoutManager 和 FlexboxLayoutManager 分别实现 线性布局、
网格布局 和 流式布局,关键代码如下所示:
class LabelLayout @JvmOverloads constructor(
    context: Context,
    attrs: AttributeSet? = null
) : RecyclerView(context, attrs) {

    /** 标签布局 - 默认为流式布局 */
    private var labelMode: LabelLayout.LabelMode = LabelLayout.LabelMode.FLEX
    /** 标签方向 - 默认为 水平 */
    private var orientation: LabelLayout.Orientation = LabelLayout.Orientation.HORIZONTAL
    /** 是否支持滚动 */
    var scrollable: Boolean = false
    /**
     * 流式布局时 item 的对齐方式
     * {@link com.google.android.flexbox.JustifyContent }
     */
    private var justifyContent: Int = 0
    /** 每行显示的 item 个数 */
    private var spanCount: Int = 0

    private fun initLabelLayout(context: Context) {
        layoutManager = when(labelMode) {
            LabelLayout.LabelMode.LINE -> object : LinearLayoutManager(context, orientation.value, false) {
                override fun canScrollHorizontally() = if (orientation == HORIZONTAL) scrollable else false
                override fun canScrollVertically()  = if (orientation == VERTICAL) scrollable else false
            }
            LabelLayout.LabelMode.GRID -> object : GridLayoutManager(context, spanCount) {
                override fun canScrollVertically() = scrollable
            }
            else -> object : FlexboxLayoutManager(context) {
                override fun canScrollVertically() = scrollable
            }.also {
                it.flexDirection = if (orientation == LabelLayout.Orientation.HORIZONTAL) FlexDirection.ROW else FlexDirection.COLUMN
                it.flexWrap = FlexWrap.WRAP
                it.justifyContent = justifyContent
            }
        }
    }

    init {
        // initAttrs(context, attrs)
        initLabelLayout(context)
    }
}
选择了合适和布局管理器,接下来只要给 RecyclerView 设置适配器等一系列操作即可,具体详情请查看源码。