前一章我们通过 jekyll new project_name 命令新建了一个 Jekyll 项目,其内容较为简单,不能满足个人网站的需求,我们现在开始着手修改。
1. 目录结构
在开始对项目进行修改前,我们有必要先了解 Jekyll 项目的目录结构,在前一章我们新建的 Jekyll 项目的目录结构如下所示:
.
+-- _posts
╎   └── 2021-09-22-welcome-to-jekyll.markdown
+-- _site
+-- 404.html
+-- _config.yml
+-- about.markdown
+-- Gemfile
+-- Gemfile.lock
└── index.markdown
当前,并非每一个项目的结构都一样。实际上,该项目还缺少两个重要目录 _includes 和 _layouts。下面对常用的目录进行说明,更多的目录信息请参考 官方文档-目录结构。
关于YAML的学习,可以访问 YAML 入门教程 | 菜鸟教程 (runoob.com)
| 目录 | 说明 |
|---|---|
| _config.yml | 保存网站配置数据,同时页面中可使用 {% site.xxx %} 调用 |
| _includes | 放置可重用的布局如 header、footer等;在其他文件中通过 {% include 文件名.扩展名t %} 引用 |
| _layouts | 布局,即文章使用的外部模板。布局可以在 YAML 头信息中根据不同文章进行选择。布局文件中使用标签 {{ content }} 将文章内容插入页面中 |
| _posts | 放置文章,文件名格式必须要符合: YEAR-MONTH-DAY-title.MAkEUP |
| _data | 存放网站数据。该目录下所有的 yaml 文件(后缀是 .yml, .yaml, .json 或者 .csv )可以通过 `site.data` 访问文件内容 |
| _site | 存放生成的网站页面放在这里,最好将这个目录放进你的 .gitignore 文件中 |
2. 修改 index
了解完目录结构后,我们开始修改项目根目录下的 index.markdown 文件,修改前的文件内容如下:
---
# Feel free to add content and custom Front Matter to this file.
# To modify the layout, see https://jekyllrb.com/docs/themes/#overriding-theme-defaults

layout: home
---
其中 --- 包裹的内容就是 YAML 头信息 , index.markdown 文件内容只指定了模板 layout。index.markdown 文件中的内容外面包裹的布局是在模板 home 中写好的,这样说可能还是比较抽象,接下来我们在实践中领悟其中的奥妙。
将文件 index.markdown 的文件名修改为 index.html, 并修改其内容如下,运行并查看显示效果。
<!DOCTYPE html>
<html>
    <head>
        <meta charset="utf-8">
        <title>Hello Jekyll</title>
    </head>
    <body>
        Hello Jekyll!!
    </body>
</html>
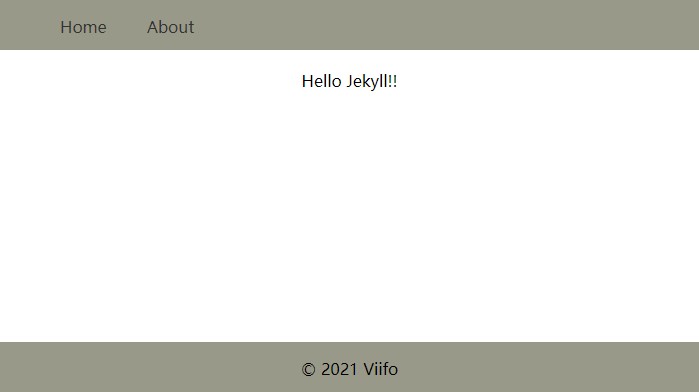
接下来我们完善下 index.html 页面,加上头部导航栏和底部版权信息,修改后的内容如下所示:
<!DOCTYPE html>
<html>
<head>
<meta charset="utf-8">
<title>Hello Jekyll</title>
<style type="text/css">
nav, footer {
    position: fixed;
    left: 0;
    width: 100%;
    height: 50px;
    background: #999988;
}
nav {
    top:0;
}
footer {
    bottom: 0;
    text-align: center;
}
nav li {
    list-style: none;
    float: left;
    display: block;
    margin: 0 20px;
    cursor: pointer;
}
nav li a {
    color: #333;
    text-decoration: none;
}
nav a:hover {
    color: white;
}
.container {
    margin-top: 70px;
    text-align: center;
}
</style>
</head>
<body>
<!-- nav -->
<nav>
    <ul>
        <li><a href="/index.html">Home</a></li>
        <li><a href="/about.html">About</a></li>
    </ul>
</nav>
<!-- /end nav -->
<!-- container -->
<div class="container">
<p>Hello Jekyll!!</p>
</div>
<!-- /end container -->
<!-- footer -->
<footer>
<p>© 2021 Viifo</p>
</footer>
<!-- /end footer -->
</body>
</html>
运行并查看显示效果,如下所示:
接下来我们修改文件 about.markdown 的文件名修改为 about.html, 并修改其内容如下:
<!DOCTYPE html>
<html>
<head>
<meta charset="utf-8">
<title>Hello Jekyll</title>
<style type="text/css">
nav, footer {
position: fixed;
left: 0;
width: 100%;
height: 50px;
background: #999988;
}
nav { top:0; }
footer { bottom: 0; text-align: center; }
nav li {
list-style: none;
float: left;
display: block;
margin: 0 20px;
cursor: pointer;
}
nav li a { color: #333; text-decoration: none; }
nav a:hover { color: white; }
.container { margin-top: 70px; text-align: center; }
</style>
</head>
<body>
<!-- nav -->
<nav>
<ul>
<li><a href="/index.html">Home</a></li>
<li><a href="/about.html">About</a></li>
</ul>
</nav>
<!-- /end nav -->
<!-- container -->
<div class="container">
<pre>
This is the base Jekyll theme.
You can find out more info about customizing your Jekyll theme,
as well as basic Jekyll usage documentation at [jekyllrb.com](https://jekyllrb.com/)
You can find the source code for Minima at GitHub:
[jekyll][jekyll-organization] /
[minima](https://github.com/jekyll/minima)
You can find the source code for Jekyll at GitHub:
[jekyll][jekyll-organization] /
[jekyll](https://github.com/jekyll/jekyll)
[jekyll-organization]: https://github.com/jekyll</pre>
</div>
<!-- /end container -->
<!-- footer -->
<footer>
<p>© 2021 Viifo</p>
</footer>
<!-- /end footer -->
</body>
</html>
再次运行并点击页面顶部导航栏查看显示效果。
3. 公共模板
由上可见 index 和 about 页面的顶部导航栏和底部版权信息是一致的,那我们能否把这公共的部分单独分离出来,在添加新页面时只关注页面中间的内容部分,不用重复关注导航栏呢?
当然可以,这时候就需要 _includes 和 _layouts 登场了。在新建模板之前,我们还有一项工作,将样式文件独立出来,我们使用时直接引入外部样式文件即可。当然,此项工作不是必须的。
在项目根目录下新建 css 文件夹并在文件夹下新增文件 styles.css, 文件内容如下:
nav, footer {
position: fixed;
left: 0;
width: 100%;
height: 50px;
background: #999988;
}
nav {
top:0;
}
footer {
bottom: 0;
text-align: center;
}
nav li {
list-style: none;
float: left;
display: block;
margin: 0 20px;
cursor: pointer;
}
nav li a {
color: #333;
text-decoration: none;
}
nav a:hover {
color: white;
}
.container {
margin-top: 70px;
text-align: center;
}
在项目根目录下新建 _includes 和 _layouts 文件夹,在 _includes 文件夹下新增文件 nav.html 和 footer.html,其内容如下:
nav.html
<!-- nav -->
<nav>
<ul>
<li><a href="/index.html">Home</a></li>
<li><a href="/about.html">About</a></li>
</ul>
</nav>
<!-- /end nav -->
footer.html
<!-- footer -->
<footer>
<p>© 2021 Viifo</p>
</footer>
<!-- /end footer -->
然后在 _layouts 目录下新建模板 default.html,内容如下。当然,模板名也可以是其他任何名字。
<!DOCTYPE html>
<html lang="en">
<head>
    <meta charset="UTF-8">
    <link rel="stylesheet" type="text/css" href="/css/styles.css">
    <title>Hello Jekyll</title>
</head>
<body>
    {% include nav.html %}
    {{ content }}
    {% include footer.html %}
</body>
</html>
到目前为止,公共模板已经准备好了。剩下的工作就是使用模板完成页面内容的显示,修改 index.html 文件和 about.html 文件,文件内容如下所示:
index.html
---
layout: default
---
<!-- container -->
<div class="container">
    <p>Hello Jekyll!!</p>
</div>
<!-- /end container -->
about.html
---
layout: default
---
<!-- container -->
<div class="container">
    <pre>
        This is the base Jekyll theme.
        You can find out more info about customizing your Jekyll theme,
        as well as basic Jekyll usage documentation at [jekyllrb.com](https://jekyllrb.com/)

        You can find the source code for Minima at GitHub:
        [jekyll][jekyll-organization] /
        [minima](https://github.com/jekyll/minima)

        You can find the source code for Jekyll at GitHub:
        [jekyll][jekyll-organization] /
        [jekyll](https://github.com/jekyll/jekyll)

        [jekyll-organization]: https://github.com/jekyll</pre>
</div>
<!-- /end container -->
现在可以运行并查看页面显示效果了。
4. 小结
- 公共模板要放置在
_layouts文件夹下; - 在模板中使用
{% include 文件名.扩展名 %}导入页面部件; - 需要使用
include导入的页面部件需要放置在_includes文件夹下; - 使用模板时需要在 YAML 头信息 中通过
layout: 模板名来指定使用的模板; - 页面内容将会被填充到对应模板中的
{{ content }}指定的部分。