SideSlipLayout 是参照安卓原生控件 DrawerLayout 打造的一个整体侧滑菜单,本文将主要介绍其实现效果、大致实现过程及滑动冲突的解决方式。
1. 预览
| 单独使用 | 与三方库一起使用 |
|---|---|
 |
 |
2. 新建控件
我们先新建 SideSlipLayout 控件,由于我们定义的控件需要包含子控件,所以要继承控件 ViewGroup ,如下所示:
package com.viifo.sidesliplayout

import android.content.Context
import android.util.AttributeSet
import android.view.ViewGroup

/**
 * 整体侧滑菜单
 */
class SideSlipLayout : ViewGroup {

    constructor(context: Context) : super(context) {
        SideSlipLayout(context, null)
    }

    constructor(context: Context, attrs: AttributeSet?) : super(context, attrs) {

    }

    override fun onLayout(changed: Boolean, l: Int, t: Int, r: Int, b: Int) {

    }
}
在测试的 activity 中添加如下布局,在布局文件中使用 SideSlipLayout 控件:
<?xml version="1.0" encoding="utf-8"?>
<androidx.appcompat.widget.LinearLayoutCompat
    xmlns:android="http://schemas.android.com/apk/res/android"
    android:layout_width="match_parent"
    android:layout_height="match_parent">

    <com.viifo.sidesliplayout.SideSlipLayout
        android:id="@+id/side_slip_layout"
        android:layout_width="match_parent"
        android:layout_height="match_parent">
    </com.viifo.sidesliplayout.SideSlipLayout>

</androidx.appcompat.widget.LinearLayoutCompat>
运行项目,当前页面效果是一片空白。
3. 布局
我们要实现侧滑菜单,则必须要在 SideSlipLayout 控件下添加两个 View,且这两个View需要水平排列,如图3.1所示。
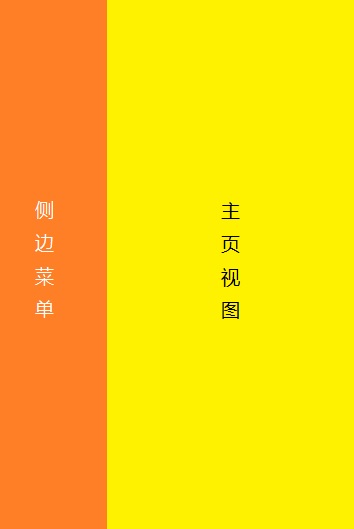
我们通过布局文件中的 layout_gravity 属性来区分侧边菜单和主页视图,并通过此属性来指定侧边菜单的放置方向。测试的 activity 中的布局文件如下所示:
<?xml version="1.0" encoding="utf-8"?>
<androidx.appcompat.widget.LinearLayoutCompat
    xmlns:android="http://schemas.android.com/apk/res/android"
    android:layout_width="match_parent"
    android:layout_height="match_parent">

    <com.viifo.sidesliplayout.SideSlipLayout
        android:id="@+id/side_slip_layout"
        android:layout_width="match_parent"
        android:layout_height="match_parent">

        <!-- 主页视图 -->
        <LinearLayout
            android:layout_width="match_parent"
            android:layout_height="match_parent"
            android:background="#F8F8A4">

        </LinearLayout>

        <!-- 侧边菜单 -->
        <LinearLayout
            android:layout_width="200dp"
            android:layout_height="match_parent"
            android:layout_gravity="start"
            android:background="#F35D5D"/>

    </com.viifo.sidesliplayout.SideSlipLayout>

</androidx.appcompat.widget.LinearLayoutCompat>
现在我们已经指定了布局文件中的侧边菜单和主页视图。下面我们需要修改 SideSlipLayout控件,指定子View的布局,即计算各个子View在屏幕上的显示位置。主页视图的放置位置不用多说,就是铺满当前屏幕;而侧边菜单的放置位置我们需要根据属性 layout_gravity 来确定。例如当前侧边菜单的 layout_gravity="start",则要将侧边菜单放置在主页视图的左侧。
现在我们开始设置子View的布局位置?别急,粗略的回顾下View的绘制流程:ononMeasure -> onLayout -> onDraw 。所以我们在确定子View的布局位置前需要先测量当前控件和子控件的大小。测量子控件大小时,对于主页视图,我们铺满屏幕即可;对于侧边菜单,我们使用布局文件中指定的大小。
我们怎样判断哪个子View是侧边菜单呢?当然是通过layout_gravity 属性来确定,不过想使用此属性,SideSlipLayout控件必须要支持 layout_gravity 属性才行。修改代码,使得SideSlipLayout控件的子控件支持layout_gravity 属性,代码如下:
package com.viifo.sidesliplayout

import android.content.Context
import android.util.AttributeSet
import android.view.Gravity
import android.view.ViewGroup

/**
 * 整体侧滑菜单
 */
class SideSlipLayout : ViewGroup {

    constructor(context: Context) : super(context) {
        SideSlipLayout(context, null)
    }

    constructor(context: Context, attrs: AttributeSet?) : super(context, attrs) {

    }


    override fun onLayout(changed: Boolean, l: Int, t: Int, r: Int, b: Int) {

    }


    /**
     * 每个子 View 拥有的布局参数
     */
    class LayoutParams : MarginLayoutParams {

        companion object {
            const val STATUS_CLOSED = 0x0
            const val STATUS_OPENED = 0x1
            private val SIDE_SLIP_LAYOUT_ATTRS = intArrayOf(android.R.attr.layout_gravity)
        }

        /**
         * 当前侧边栏的显示状态
         */
        var dragState = STATUS_CLOSED
        /**
         * 子 view 除了支持 margin 外还应支持 layout_gravity 参数,以便设置侧边栏方向.
         */
        var gravity = Gravity.NO_GRAVITY

        constructor(c: Context, attrs: AttributeSet?) : super(c, attrs) {

            val a = c.obtainStyledAttributes(attrs, SIDE_SLIP_LAYOUT_ATTRS)
            this.gravity = a.getInt(0, Gravity.NO_GRAVITY)
            a.recycle()
        }

        constructor(width: Int, height: Int): super(width, height) {}

        constructor(width: Int, height: Int, gravity: Int) : this(width, height) {
            this.gravity = gravity
        }

        constructor(source: LayoutParams) : super(source) {
            this.gravity = source.gravity
        }

        constructor(source: ViewGroup.LayoutParams) : super(source) {}

        constructor(source: MarginLayoutParams) : super(source) {}

    }

    /**
     * 将子 View 添加到此容器中时生成默认的 [LayoutParams]
     */
    override fun generateDefaultLayoutParams(): ViewGroup.LayoutParams {
        return LayoutParams(ViewGroup.LayoutParams.MATCH_PARENT, ViewGroup.LayoutParams.MATCH_PARENT)
    }

    /**
     * 根据子 View 的 [ViewGroup.LayoutParams] 生成 [LayoutParams]
     */
    override fun generateLayoutParams(p: ViewGroup.LayoutParams?): ViewGroup.LayoutParams {
        return when (p) {
            is LayoutParams -> {
                LayoutParams(p)
            }
            is MarginLayoutParams -> {
                LayoutParams(p)
            }
            else -> {
                LayoutParams(p!!)
            }
        }
    }

    /**
     * 根据子 View 的 [AttributeSet] 生成 [LayoutParams]
     */
    override fun generateLayoutParams(attrs: AttributeSet?): ViewGroup.LayoutParams {
        return LayoutParams(context, attrs)
    }

    /**
     * 检查子 View的布局参数 [LayoutParams] 是否合法.
     */
    override fun checkLayoutParams(p: ViewGroup.LayoutParams?): Boolean {
        return (p is LayoutParams) && super.checkLayoutParams(p)
    }

}
现在可以进行控件测量了,测量部分代码如下:
/** 内容视图 */
private var contentView: View? = null
private var contentPoint: Point = Point(0, 0)
/** 侧边栏 */
private var sideView: View? = null
private var sidePoint: Point = Point(0, 0)


/**
 * 测量此 ViewGroup 和所有 Child View 的大小
 */
override fun onMeasure(widthMeasureSpec: Int, heightMeasureSpec: Int) {
    // 当前 ViewGroup 必须要有两个子 View
    val count = childCount
    check(count == 2) {"The number of child view for the SideslipLayout must be two."}

    if (this.contentView == null || this.sideView == null) {
        for (i in 0 until count) {
            val child = getChildAt(i)
            if (isContentView(child)) {
                this.contentView = child
            } else {
                this.sideView = child
            }
        }
    }

    // 获取并设置当前 ViewGroup 的可用大小
    val widthSize = MeasureSpec.getSize(widthMeasureSpec)
    val heightSize = MeasureSpec.getSize(heightMeasureSpec)
    setMeasuredDimension(widthSize, heightSize)

    // 设置内容 View 的大小
    var lp = this.contentView!!.layoutParams as LayoutParams
    var widthSpec = MeasureSpec.makeMeasureSpec(widthSize - lp.leftMargin - lp.rightMargin, MeasureSpec.EXACTLY)
    var heightSpec = MeasureSpec.makeMeasureSpec(heightSize - lp.topMargin - lp.bottomMargin, MeasureSpec.EXACTLY)
    this.contentView!!.measure(widthSpec, heightSpec)

    // 设置侧边栏 View 的大小
    lp = this.sideView!!.layoutParams as LayoutParams
    widthSpec = getChildMeasureSpec(widthMeasureSpec, lp.leftMargin + lp.rightMargin, lp.width)
    heightSpec = getChildMeasureSpec(heightMeasureSpec, lp.topMargin + lp.bottomMargin, lp.height)
    this.sideView!!.measure(widthSpec, heightSpec)
}

/**
 * 判断当前视图是否是内容视图
 */
private fun isContentView(child: View): Boolean {
    return (child.layoutParams as LayoutParams).gravity == Gravity.NO_GRAVITY
}
对 view 进行测量后,就可以开始进行子控件的布局设置,布局部分代码如下:
/**
 * 计算所有子 View 的显示位置
 */
override fun onLayout(changed: Boolean, l: Int, t: Int, r: Int, b: Int) {
    // 设置内容视图的显示位置
    var child = this.contentView!!
    var lp = child.layoutParams as SideSlipLayout.LayoutParams
    child.layout(lp.leftMargin, lp.topMargin, lp.leftMargin + child.measuredWidth, lp.topMargin + child.measuredHeight)
    this.contentPoint.x = child.left
    this.contentPoint.y = child.top

    // 设置侧边栏的显示位置
    // 当前只能将侧边栏设置在内容视图的左侧或者右侧
    child = this.sideView!!
    lp = child.layoutParams as SideSlipLayout.LayoutParams
    check(lp.gravity == Gravity.START || lp.gravity == Gravity.LEFT
            || lp.gravity == Gravity.END || lp.gravity == Gravity.RIGHT) {
        "Currently supports the side slip menu to be placed on the left or right for the content view."
    }

    // 父容器的可用宽度
    val width = r - l
    // Drawer, if it wasn't onMeasure would have thrown an exception.
    val childWidth = child.measuredWidth
    val childHeight = child.measuredHeight
    var childLeft = 0
    // 计算侧边栏的显示位置
    when(lp.gravity) {
        Gravity.START, Gravity.LEFT -> childLeft = -childWidth
        Gravity.END, Gravity.RIGHT -> childLeft = width
    }
    // 设置侧边栏的显示位置
    child.layout(childLeft, lp.topMargin, childLeft + childWidth, lp.topMargin + childHeight)
    this.sidePoint.x = child.left
    this.sidePoint.y = child.top
}
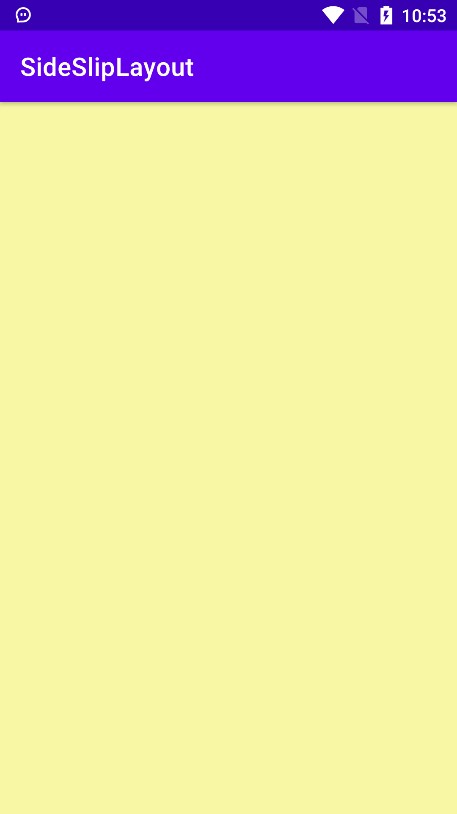
图3.2展示了当前项目的运行效果,可以看到我们的主页视图正常显示。也许你要问侧边栏呢?,别急,侧边栏被放置在了主页视图侧面,需要滑动视图才能显示,下一步我们开始实现滑动效果。
4. 拖拽|滑动
我们使用官方提供的 ViewDragHelper 来实现对控件的拖拽,实现简单的整体拖拽代码如下:
/** 拖拽相关工具类 */
private lateinit var mDragger: ViewDragHelper
private lateinit var mDraggerCallback: ViewDragCallback


constructor(context: Context) : super(context) {
    SideSlipLayout(context, null)
}

constructor(context: Context, attrs: AttributeSet?) : super(context, attrs) {
    this.mDraggerCallback = ViewDragCallback(this)
    this.mDragger = ViewDragHelper.create(this, 1f, mDraggerCallback)
}

override fun onInterceptTouchEvent(ev: MotionEvent): Boolean {
   mDragger.shouldInterceptTouchEvent(ev)
}

override fun onTouchEvent(ev: MotionEvent): Boolean {
    mDragger.processTouchEvent(ev)
    return true
}

/**
 * ViewDragHelper 的方法回调.
 */
private class ViewDragCallback(private val sideSlipLayout: SideSlipLayout) : ViewDragHelper.Callback() {

    /** 上一次 view 水平移动到的位置 */
    var prevLeft = 0;

    /**
     * 是否捕获当前手指按下的 View, 只有捕获此 View 才能进行下一步的拖拽动作,否则此次拖拽对当前 View 无效.
     */
    override fun tryCaptureView(child: View, pointerId: Int): Boolean {
        // 响应当前view的拖拽
        return true
    }

    /**
     * 水平拖拽回调,处理 View 的水平拖拽。
     * 由于侧边栏与内容视图是整体滑动,所以需要手动处理手指没有按下的另一个 View 的显示位置.
     */
    override fun clampViewPositionHorizontal(child: View, left: Int, dx: Int): Int {
        prevLeft = child.left
        // 拖拽 View 的水平移动目标位置
        return left
    }

    /**
     * 当前 View 的位置改变回调。当手指抬起时,需逐帧更新另一个 View 的显示位置,实现同被拖拽的 View 同步的回弹/吸附效果。
     */
    override fun onViewPositionChanged(changedView: View, left: Int, top: Int, dx: Int, dy: Int) {
        // 为实现整体侧滑效果, 需设置另一个 View 的水平偏移
        val otherChild = if (sideSlipLayout.contentView == changedView) {
            sideSlipLayout.sideView!!
        } else {
            sideSlipLayout.contentView!!
        }
        ViewCompat.offsetLeftAndRight(otherChild, left - prevLeft)
        prevLeft = left
    }

    /**
     * View 停止拖拽,即手指抬起时调用。此时需处理此 View 的回弹和吸附效果。
     * 因回弹和吸附效果在此回调中只设置目标位置,所以需记录当前 View 所处的显示位置,为另一个View位置的更新做准备。
     */
    override fun onViewReleased(releasedChild: View, xvel: Float, yvel: Float) {

    }
}
现在就可以运行项目尝试滑动了。本文只讲解其简单实现,关于拖拽回弹&吸附、当前侧边栏的状态监听等内容请查看 项目源码 。
5. 滑动冲突
5.1 滑动冲突示例
导入SwipeRecyclerView 侧滑删除列表依赖:
implementation 'com.yanzhenjie.recyclerview:x:1.3.2'
修改测试的 activity 中的布局文件:
<?xml version="1.0" encoding="utf-8"?>
<androidx.appcompat.widget.LinearLayoutCompat
    xmlns:android="http://schemas.android.com/apk/res/android"
    android:layout_width="match_parent"
    android:layout_height="match_parent">

    <com.viffo.sidesliplayout.SideSlipLayout
        android:id="@+id/side_slip_layout"
        android:layout_width="match_parent"
        android:layout_height="match_parent">

        <LinearLayout
            android:layout_width="match_parent"
            android:layout_height="match_parent"
            android:orientation="vertical"
            android:gravity="start"
            android:background="#F8F8A4">

            <com.yanzhenjie.recyclerview.SwipeRecyclerView
                android:id="@+id/swip_recycler_view"
                android:layout_width="match_parent"
                android:layout_height="match_parent"/>

        </LinearLayout>

        <LinearLayout
            android:layout_width="200dp"
            android:layout_height="match_parent"
            android:layout_gravity="start"
            android:background="#F35D5D"/>

    </com.viffo.sidesliplayout.SideSlipLayout>

</androidx.appcompat.widget.LinearLayoutCompat>
新增列表适配器 MyAdapter:
package com.viifo.sidesliplayout.demo

import android.view.LayoutInflater
import android.view.View
import android.view.ViewGroup
import android.widget.TextView
import androidx.recyclerview.widget.RecyclerView
import com.viffo.sidesliplayout.demo.R

class MyAdapter(val items: List<String>) : RecyclerView.Adapter<MyAdapter.VH>() {

    class VH(root: View) : RecyclerView.ViewHolder(root) {

    }

    override fun onCreateViewHolder(parent: ViewGroup, viewType: Int): VH {
        val view = LayoutInflater.from(parent.context).inflate(R.layout.layout_item, null, false)
        return VH(view)
    }

    override fun onBindViewHolder(holder: VH, position: Int) {
        holder.itemView.findViewById<TextView>(R.id.tv_txt).text = items[position]
    }

    override fun getItemCount(): Int {
        return items.size
    }
}
修改测试Activity代码,添加列表:
package com.viifo.sidesliplayout.demo

import android.graphics.Color
import android.os.Bundle
import androidx.appcompat.app.AppCompatActivity
import androidx.recyclerview.widget.LinearLayoutManager
import com.viffo.sidesliplayout.demo.R
import com.yanzhenjie.recyclerview.SwipeMenu
import com.yanzhenjie.recyclerview.SwipeMenuCreator
import com.yanzhenjie.recyclerview.SwipeMenuItem
import com.yanzhenjie.recyclerview.SwipeRecyclerView

class DemoActivity : AppCompatActivity() {

    override fun onCreate(savedInstanceState: Bundle?) {
        super.onCreate(savedInstanceState)
        setContentView(R.layout.activity_demo)

        val swipeRecyclerView = findViewById<SwipeRecyclerView>(R.id.swip_recycler_view)
        // 设置监听器
        swipeRecyclerView.setSwipeMenuCreator(object : SwipeMenuCreator{
            override fun onCreateMenu(leftMenu: SwipeMenu?, rightMenu: SwipeMenu?, position: Int) {
                val deleteItem = SwipeMenuItem(this@DemoActivity)
                deleteItem.text = "删除"
                deleteItem.width = 300
                deleteItem.setBackgroundColor(Color.parseColor("#ff0000"))
                rightMenu?.addMenuItem(deleteItem)
            }
        })

        swipeRecyclerView.layoutManager = LinearLayoutManager(this, LinearLayoutManager.VERTICAL, false)
        swipeRecyclerView.adapter = MyAdapter(listOf("item1","item2","item3","item4","item5","item6","item7","item8","item9"))
    }

}
图5.1 展示了当前代码的演示效果。可以看到我们在展开列表侧滑删除菜单后,再次向右滑动时出现滑动冲突。正确的显示效果应该为:向右滑动时应该先关闭侧滑删除菜单,然后 SideSlipLayout 才能展开侧边菜单。
5.2 解决滑动冲突
修改 SideSlipLayout,添加静态属性和方法:
companion object {
    /** 不拦截 Touch 事件 */
    private var mDisallowInterceptRequested = false

    @JvmStatic
    fun requestDisallowInterceptTouch(disallow: Boolean) {
        mDisallowInterceptRequested = disallow
    }
}
修改SideSlipLayout 的 Touch 事件拦截方法,使其支持子控件主动请求父控件不拦截Touch事件,从而解决滑动冲突。如下所示:
override fun onInterceptTouchEvent(ev: MotionEvent): Boolean {
    when(ev.action) {
        MotionEvent.ACTION_DOWN,
        MotionEvent.ACTION_UP,
        MotionEvent.ACTION_CANCEL -> {
            mDisallowInterceptRequested = false
        }
    }
    return if (mDisallowInterceptRequested) {
        super.onInterceptTouchEvent(ev)
    } else {
        mDragger.shouldInterceptTouchEvent(ev)
    }
}
现在运行项目,滑动冲突已被解决。当然,本示例中的滑动冲突被解决是应为侧滑菜单列表库中存在请求父控件是否拦截Touch事件的方法。下面截取本例中使用的侧滑删除列表库 SwipeRecyclerView 的部分实现代码:
// They are sensitive to retain sliding and inertia.
case MotionEvent.ACTION_MOVE: {
    ......
    // 向右滑,显示左侧菜单,或者关闭右侧菜单。
    ......
    viewParent.requestDisallowInterceptTouchEvent(showRightCloseLeft || showLeftCloseRight);
}
以上代码表面此三分库中已经存在了处理与父控件滑动冲突的代码。若使用的库中没有,或者存在其他需求,则需要根据具体的业务逻辑调用以下方法来请求父控件是否拦截Touch事件。
getParent().requestDisallowInterceptTouchEvent(Boolean)
有关更多内容请查看 项目主页 。